If you've spent any time trying to figure out why your guitar doesn't sound like the records you're chasing, the answer almost always lives in the chain. Not the amp. Not the guitar. The order of effects after the amp, the way each one talks to the next, and a few specific moves that have become signatures of modern indie production.
This article walks through the four-plugin chain behind a lot of those records. The exact tones change record to record, but the architecture stays remarkably consistent: pitch-shifted guitar, into cassette tape character, into a gated dirty reverb, with vintage BBD chorus sitting somewhere in the middle. Each piece does one specific job. Together they produce that immediately recognizable sound that doesn't quite belong to any one decade.
Below is a video walkthrough, then a breakdown of what each plugin is doing and why.
Step 1: Pitch the Guitar Down
Listen to a Mk.gee record and one of the first things you'll notice is that the guitar doesn't sit where you expect it to. The note feels lower, but not in a baritone way exactly. Heavier in the body. Slightly detached from the original instrument. That's almost always a pitch shifter doing quiet work at the front of the chain.
The trick is restraint. You're not doing a full octave drop. You're dropping a few semitones, sometimes just one or two, which thickens the body of the note without making it obvious the guitar is shifted. Done right it sounds like the guitar is just darker, fuller, more committed. Done wrong it sounds like an octaver.
In our chain we use the pitch shifter inside Roomtone Amp Sim for this, with the amp and cabinet bypassed. We're only borrowing the pitch effect. That keeps the signal clean enough to pass into the rest of the chain.
Pitch settings to start with
- Drop of 2 to 4 semitones. Try -3 first.
- Wet/dry around 70 to 100 percent (often fully wet for that "baritone without a baritone" feel).
- Bypass the amp section if your pitch shifter is bundled with one. You want just the pitch effect.
Step 2: Pass It Through Tape
Tape is the next move because it sits between the source signal and any modulation. The job of tape in this chain is twofold. First, it softens the digital edges of the pitch-shifted signal. Pitch shifters add small artifacts in the high end that are immediately obvious, and tape's natural high-frequency rolloff smooths them out. Second, it adds wow and flutter, which is the slow, almost-imperceptible pitch instability that makes a recording sound like a recording rather than a perfect digital take.
The reference for this character is the Tascam Portastudio cassette 4-track, specifically the 424, which is the recorder a lot of bedroom indie records were built on through the 90s. Mk.gee has talked openly about working in cassette workflows, and it shows in the texture of his records. The signal feels older than it is.
Our 4TRK plugin emulates the 424 chain directly. The character knob is doing the heavy lifting here, with a small amount of warmth and a touch of drift. You don't need much. Too much wow/flutter starts to sound seasick. The goal is for the listener to feel the tape rather than hear it.

Tape settings to start with
- Tape speed: 3.75 ips (the warmer setting, more typical of Portastudio use).
- Warmth: 40 to 60 percent. Enough to round the top end without smearing.
- Drift: 15 to 30 percent. Subtle pitch instability without obvious pitch wandering.
- Texture: 20 to 40 percent. A touch of cassette noise floor.
Step 3: Add Chorus or Vibrato
This is where the chain gets its movement. A static guitar sound can be technically beautiful but emotionally flat. Modulation, especially the kind that came out of bucket brigade chips in the late 70s and early 80s, gives the signal life without drawing attention to itself. The signal moves. It doesn't perform.
For modern indie tones, slow chorus and subtle vibrato are doing most of the work. Boy Pablo's clean guitar tones lean heavily on a slow chorus. Mk.gee's modulated parts often use vibrato instead of chorus, which adds slight pitch wobble without the wet-signal layering of a chorus pedal. Same circuit family, different application.
We use CST-1 here in either chorus or vibrato mode. The thing CST-1 gets right that most digital chorus plugins miss is the high-frequency darkening, which is a real artifact of the bucket brigade chip itself. That's covered in detail in our BBD chorus guide if you want the deeper read.
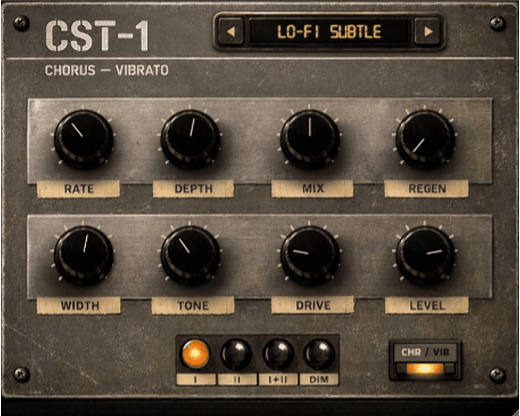
Modulation settings to start with
- For chorus shimmer: Slow rate (0.6 to 1.0 Hz), low depth (15 to 25 percent), mix around 30 percent. Single voice for vintage, dual voice for modern.
- For vibrato wobble: Mid rate (3 to 5 Hz), low depth (10 to 15 percent), 100 percent wet (vibrato has no dry signal).
- Position: after tape, before reverb.
Step 4: Gated Dirty Reverb
The last move is reverb. But not just reverb. The trick that defines the modern indie sound is that the reverb is gated and slightly dirty, which means two things happen at once: the reverb tail is shaped by the player's envelope (it blooms when you play and chops when you stop), and the wet path has its own distortion that the dry path doesn't.
Both of these moves come from older techniques used in different ways. Gated reverb traces back to the Phil Collins drum sound of the early 80s, where the reverb tail was cut off abruptly with a noise gate. Dirty reverb traces to studio engineers running reverb returns through tape saturation or guitar amps to roughen them up. Modern indie production borrows both at once, and the combination produces a tail that feels percussive rather than ambient.
Why does this work? A regular reverb on indie guitar is too polite. It sits on top of the mix and adds wash without committing. A dirty, gated reverb does the opposite. The dirt gives the tail body, the gate ties it to the rhythm. You get a reverb that pushes the song forward instead of softening it.
We built DV-1 specifically for this move. The threshold knob controls the gate. The wet-only distortion is on the reverb path, not the dry, so your guitar's attack stays articulate while the tail gets thick.

Gated dirty reverb settings to start with
- Decay: 1.5 to 3 seconds. Long enough to feel, short enough to chop cleanly.
- Mode: bright for shimmer-leaning tones, dark for warmer dream-pop washes.
- Drive (wet only): 30 to 50 percent. You want the tail thick, not crushed.
- Gate threshold: set so the tail cuts during note-off but stays through sustained passages. Adjust with the guitarist actually playing, not in isolation.
- Mix: 30 to 50 percent.
The Order Matters
If you take one thing from this, take this: the order of the chain is the chain. Swap any two and you lose the sound.
Pitch goes first because everything downstream needs to see the shifted signal. If you pitch-shift after tape, the tape's wow and flutter gets pitched too, and the artifact stacks badly. If you pitch-shift after reverb, the tail pitches with the guitar, which sounds wrong almost immediately.
Tape goes second because it cleans up the pitch shifter's high-end artifacts and adds the foundational character that the modulation and reverb are going to amplify. Run modulation before tape and the chorus sounds digital. Run reverb before tape and you lose the gated feel because tape smooths everything.
Modulation sits third because chorus on a tape-treated signal is doing two things: adding the obvious wet motion, and also slightly thickening the existing tape drift. Stack them right and the modulation feels analog. Stack them wrong and the chorus sits on top.
Reverb is always last because reverb's job is to integrate everything before it into a single coherent space. If anything sits after reverb (other than a master compressor or limiter on the bus), you break the spatial illusion.
Putting It Together
Here's a starting recipe for that "I'm chasing a Mk.gee tone" feeling, knowing the actual records are doing more than this and knobs vary track to track. If you want the settings-first cheat sheet without the theory, our guide to the Mk.gee guitar tone lays out the numbers and answers the common gear questions:
- Guitar signal in. Clean guitar, ideally a slightly darker pickup or neck position. Single coils work well, humbuckers also fine if the amp stays clean.
- Roomtone Amp Sim: amp bypassed, cabinet bypassed, pitch shifter on, -3 semitones, 100 percent wet.
- 4TRK: 3.75 ips, warmth 50 percent, drift 20 percent, texture 30 percent.
- CST-1: vibrato mode, rate 4 Hz, depth 12 percent, 100 percent wet. Or chorus mode if you want lift instead of wobble.
- DV-1: decay 2 seconds, bright mode, drive 40 percent, gate threshold set by playing, mix 35 percent.
That gets you in the neighborhood. From there it's iteration. Every record sounds like the artist's specific dialing in of the same broad architecture. Mk.gee leans heavier on vibrato. Boy Pablo leans heavier on slow chorus. Wallows uses less pitch shifting and more gain. Same architecture, different priorities.
Get all three modulation pieces as a bundle
4TRK + CST-1 + DV-1 as the Indie Guitar Chain bundle. Three plugins, one signal chain. $49 (currently $39 during launch week), saves up to $28 off retail.
See the BundleWhat's Actually Happening
The reason this chain works isn't that any one plugin is special. It's that each one solves a specific problem that the next one needs solved before it can do its job.
The pitch shifter solves "this guitar sounds too clean and too in its own register." Tape solves "this pitch shifter sounds digital." Modulation solves "this signal isn't moving." Reverb solves "this signal isn't sitting in a space." Each plugin is fixing what the previous one introduced while also setting up what the next one needs.
That's the whole trick of indie production, really. The famous records aren't using the most expensive plugins or the rarest hardware. They're stacking modest tools in a deliberate order, and trusting that the chain produces something the individual pieces can't.
For more on individual pieces of the chain, our BBD chorus guide goes deep on what makes vintage modulation actually sound vintage, and our lo-fi tape saturation guide covers the Tascam 424 character in more detail. The lo-fi guitar tones piece shares the broader signal-chain context if you want to keep building this out.